Using Kaspersky Scan Engine with F5 BIG-IP Application Security Manager
Using Kaspersky Scan Engine with F5 BIG-IP Application Security Manager
5 March 2024
ID 221109
You can configure Kaspersky Scan Engine to work with F5 BIG-IP® Application Security Manager™ (hereinafter ASM). For convenience, this process is separated into several steps.
Step I. Configuring Kaspersky Scan Engine
To configure Kaspersky Scan Engine, do one of the following:
- In the ICAP mode configuration file, set the value of the
VirusNameICAPHeaderelement toX-Virus-ID. - In the Service page of Kaspersky Scan Engine GUI, set the value of the Detected object name HTTP header field to
X-Virus-ID.
Step II. Configuring ASM
To configure ASM:
- Log in to the Configuration utility.
- Go to Security > Options > Application Security > Integrated Services > Anti-Virus Protection.
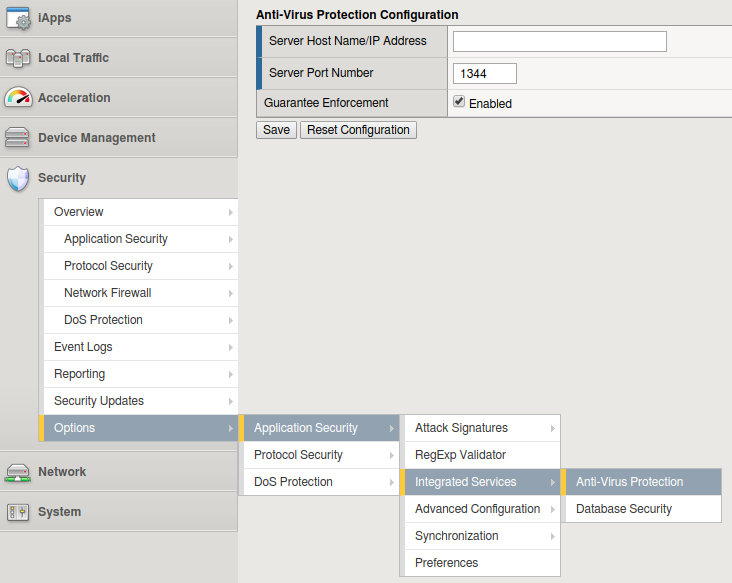
Anti-Virus Protection
- In the Server Host Name/IP Address field, specify the IP address of the Kaspersky Scan Engine ICAP server.
- In the Server Port Number field, specify the port of the Kaspersky Scan Engine ICAP server in or leave the default value of
1344. - Select the Guarantee Enforcement check box if you want the system to perform virus checking even if this may slow your web application.
- Click Save.
- To apply the security policy changes immediately, click Apply Policy.
- Go to Security > Options > Application Security > Advanced Configuration > System Variables.
- Configure the internal variables:
- In ASM 13.1.X - 16.X:
- For the icap_uri setting, enter
/reqin the Parameter Value setting. This is the default value inReqModeAddress. - For the virus_header_name setting, enter
X-Virus-IDin the Parameter Value setting. - Select Update.
- For the icap_uri setting, enter
- In ASM 11.X - 13.0.X:
- For the icap_uri setting, enter
/reqin the Parameter Value setting. This is the default value inReqModeAddress. - For the virus_header_name setting, enter
X-Virus-ID. - Select Save.
- For the icap_uri setting, enter
- In ASM 13.1.X - 16.X:
Configuring blocking of detected objects
To configure blocking of detected objects:
- In ASM 13.1.X - 16.X:
- Log in to the Configuration utility.
- Go to Security > Application Security > Policy Building > Learning and Blocking Settings.
- Set the view to Advanced.
- Expand Antivirus (expand Antivirus Protection in versions earlier than 14.X) and select either or both of the Alarm and Block check boxes for the Virus Detected violation.
- Click Save.
- To activate the security policy changes immediately, select Apply Policy.
- In ASM 12.X:
- Log in to the Configuration utility.
- Go to Security > Application Security > Policy Building > Learning and Blocking Settings.
- Set the view to Advanced.
- Expand Policy General Features and select either or both of the Alarm and Block check boxes for the Virus Detected violation.
- Click Save.
- To apply the security policy changes immediately, click Apply Policy.
- In ASM 11.X:
- Log in to the Configuration utility.
- Go to Security > Application Security > Blocking.
- Under Violations List, for Negative Security Violations select either or both of the Alarm and Block check boxes for the Virus Detected violation.
- Click Save.
- To activate the security policy changes immediately, click Apply Policy.
Configuring scanning of uploaded files and email attachments
To configure scanning of uploaded files and email attachments:
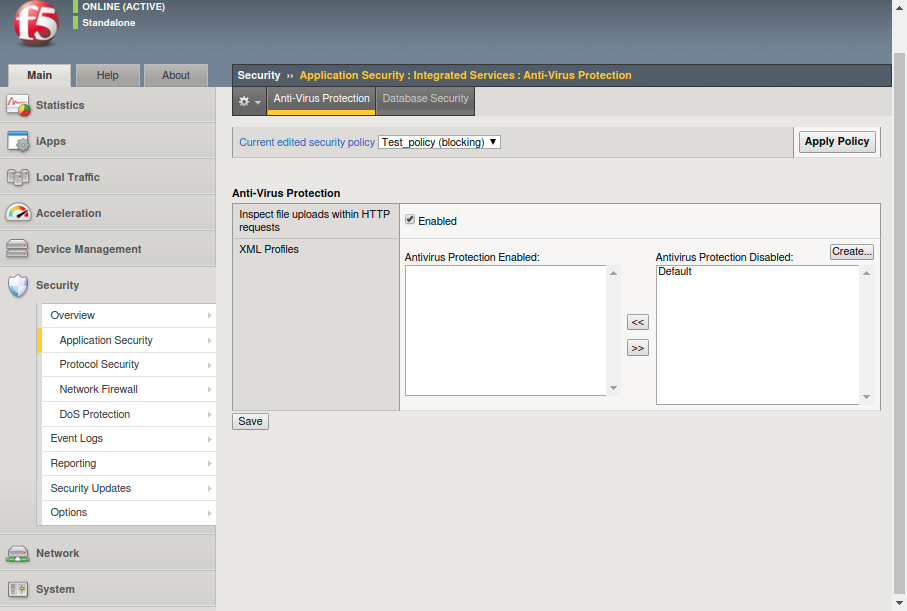
- Go to Security > Application Security > Integrated Services > Anti-Virus Protection.
- Select the relevant security policy from the list.
- Select the Inspect file uploads within HTTP requests check box.
- To scan SOAP attachments, move the relevant XML profiles from the Antivirus Protection Disabled list to the Antivirus Protection Enabled list.
- Click Save.
- To apply the security policy changes immediately, click Apply Policy.
Apply Policy
Reviewing the detect objects
To view reports on detected objects:
- Log in to the Configuration utility.
- Go to Security > Reporting > Application > Charts.
- Select Top Viruses Detected in the charts list.
The system will display the detected viruses over time.
Did you find this article helpful?
What can we do better?
Thank you for your feedback! You're helping us improve.
Thank you for your feedback! You're helping us improve.
