How to add files to an archive using standard Windows tools and third-party applications
Latest update: August 31, 2023
ID: 6239
Optimal protection for Windows
How to add files to an archive using standard Windows tools
- Select the files which you want to archive.
- Right-click any selected file.
- Follow one of the instructions below depending on your OS version:
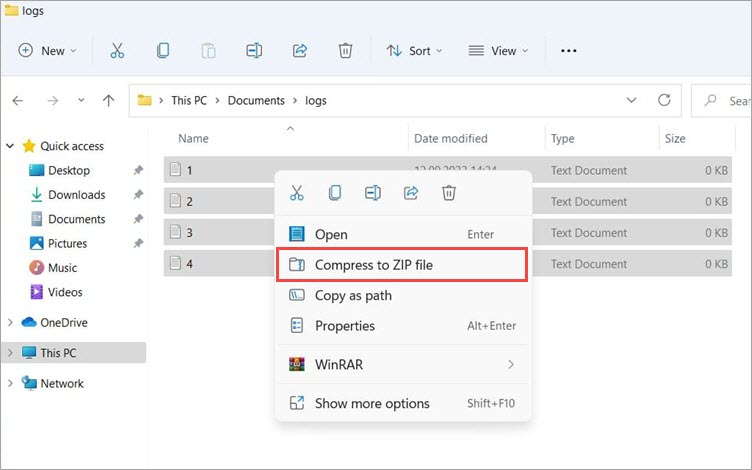
- For Windows 11: In the context menu, select Compress to ZIP file.
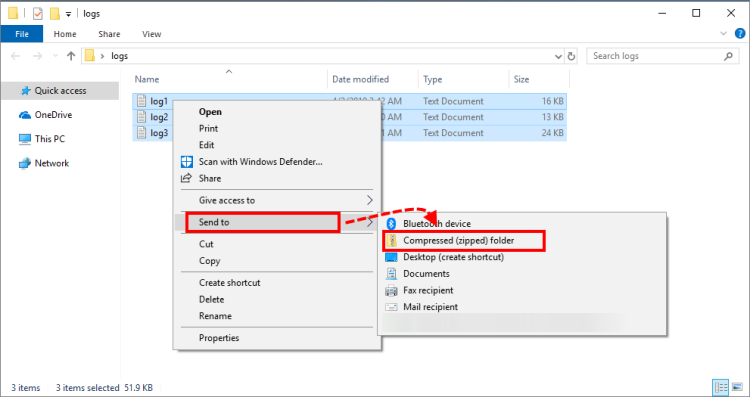
- For Windows 10 and earlier: In the context menu, select Send to → Compressed (zipped) folder.
How to add files to an archive using 7-Zip
- Select the files which you want to archive.
- Right-click any selected file.
- Follow one of the instructions below depending on your OS version:
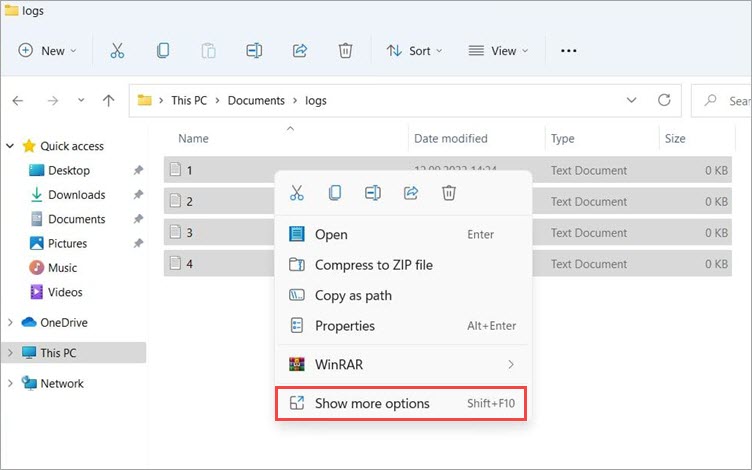
- For Windows 11: In the context menu, select Show more options → 7-Zip → Add to archive.
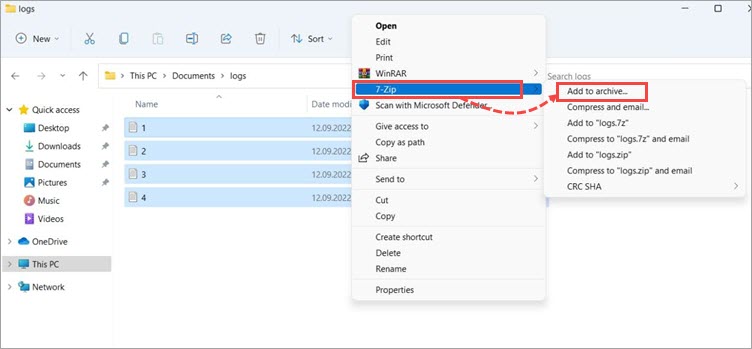
- For Windows 10 and earlier: 7-Zip → Add to archive.
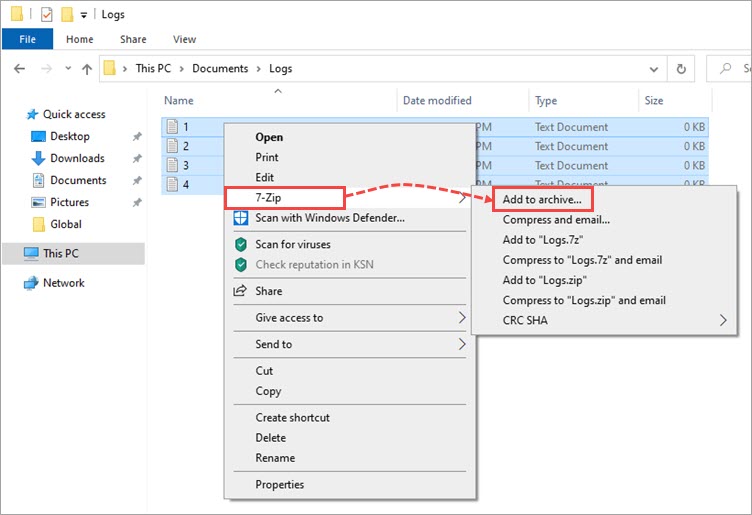
- Enter the archive name and click
 if you want to specify the location of the created archive. By default, the archive will be created in the same location as the original folder and will have the name of this folder.
 - Select the format for the created archive. We recommend to use the 7z format.
- Click ОК.
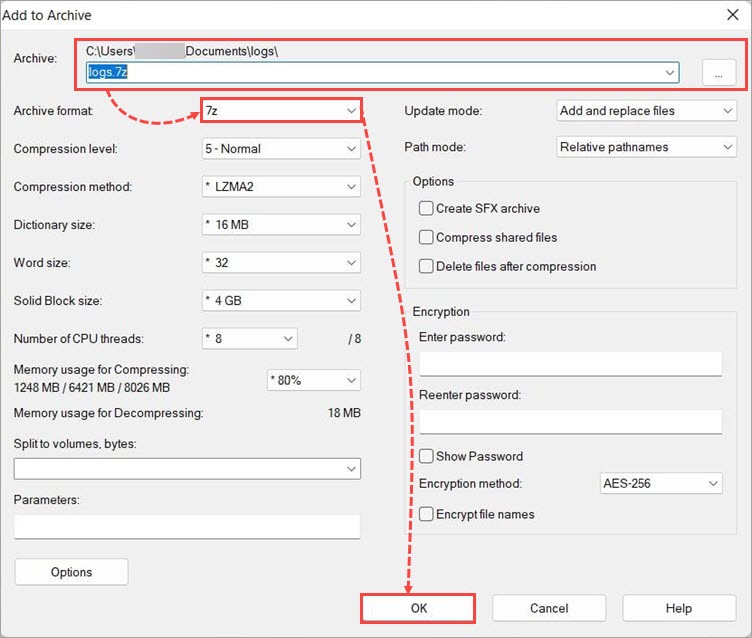
The ZIP archive with the selected files will be created.
How to add files to an archive and split it using 7-Zip
- Right-click the selected folder or files.
- Follow one of the instructions below depending on your OS version:
- For Windows 11: In the context menu, select Show more options → 7-Zip → Add to archive.


- For Windows 10 and earlier: 7-Zip → Add to archive.

- In the Archive format field, select 7z. In the Split to volumes, bytes field, set the value 2000M unless a Customer Service specialist recommends otherwise.
- Click ОК.
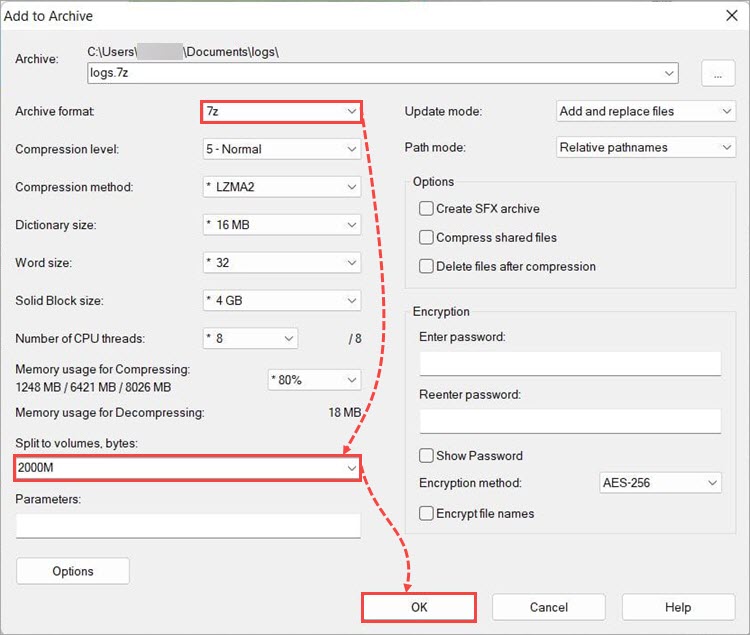
As a result, several 2 GB archives will be created.
How to add files to an archive and password protect it using 7-Zip
- Right-click the selected folder or files.
- Follow one of the instructions below depending on your OS version:
- For Windows 11: In the context menu, select Show more options → 7-Zip → Add to archive.


- For Windows 10 and earlier: 7-Zip → Add to archive.

- Think of a password for the archive. In the Encryption block, enter it in the Enter password: and Reenter password: fields.
We recommend using one of the standard passwords: virus, infected or kaspersky.
- Click ОК.
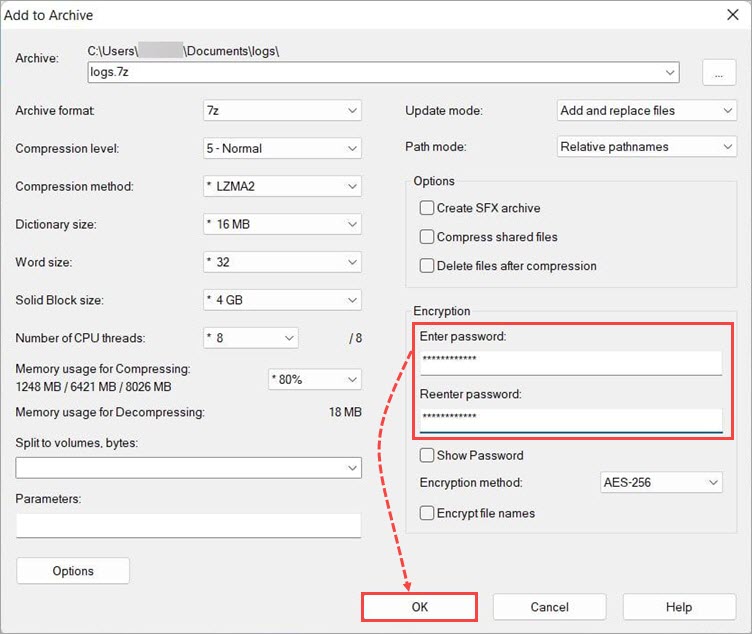
The password-protected archive will be created.
How to add files to an archive using WinRAR
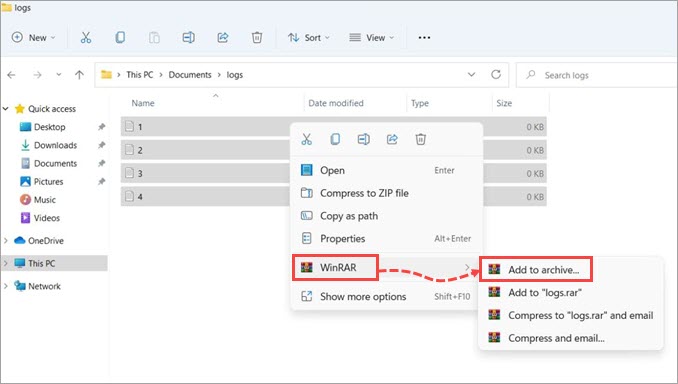
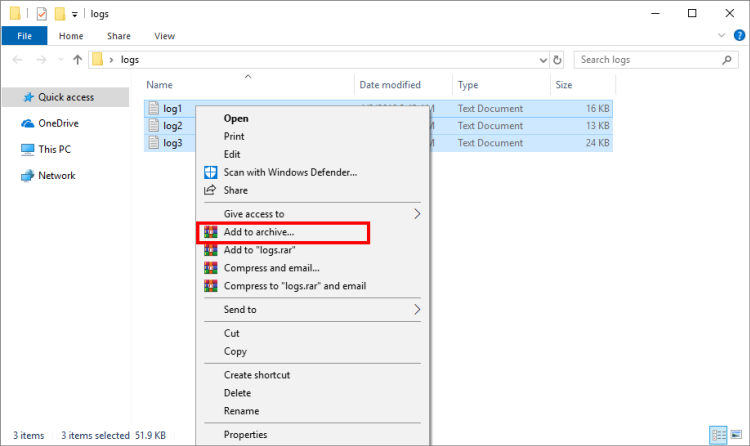
- Select the files which you want to archive.
- Right-click any selected file.
- Follow one of the instructions below depending on your OS version:
- For Windows 11: In the context menu, select WinRAR → Add to archive.
- For Windows 10 and earlier: Add to archive.
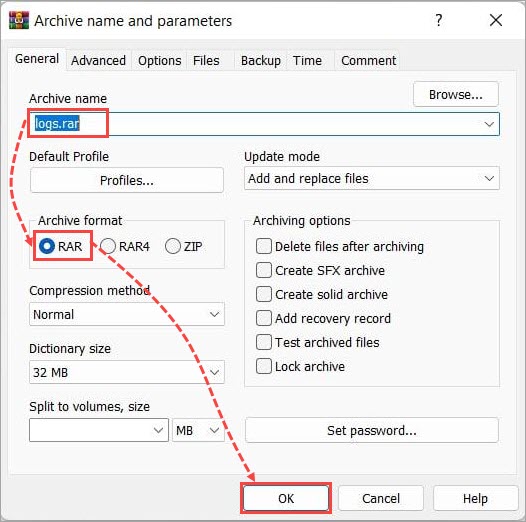
- Specify the archive’s name and click Browse if you want to specify its path. By default, the archive will be created in the same folder as the original files you have compressed.
- Select the format for the created archive. We suggest choosing the RAR format.
- Click ОК.
How to add files to an archive and split it using WinRAR
- Right-click the selected folder or files. Follow one of the instructions below depending on your OS version:
- For Windows 11: In the context menu, select WinRAR → Add to archive.

- For Windows 10 and earlier: Add to archive.

- In the Archive format field, select RAR. In the Split to volumes, size field, set the value 2000 МB unless a Customer Service specialist recommends otherwise.
- Click ОК.
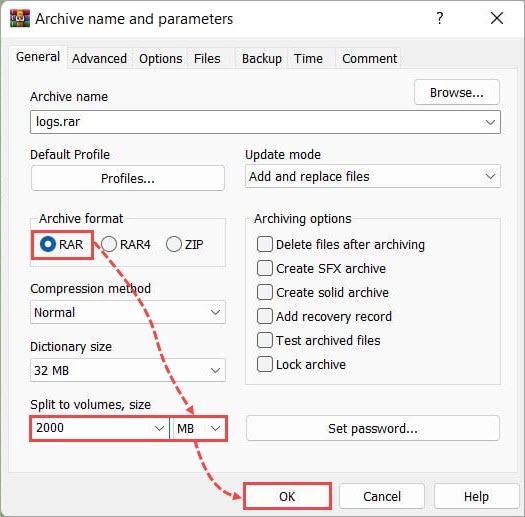
As a result, several 2 GB archives will be created.
How to add files to an archive and password protect it using WinRAR
- Right-click the selected folder or files. Follow one of the instructions below depending on your OS version:
- For Windows 11: In the context menu, select WinRAR → Add to archive.

- For Windows 10 and earlier: Add to archive.

- Click Set password.
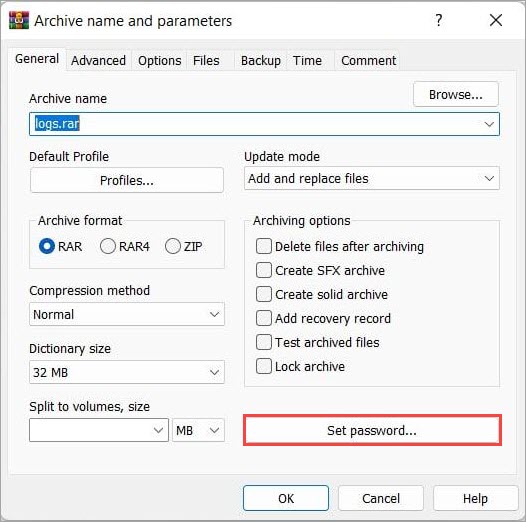
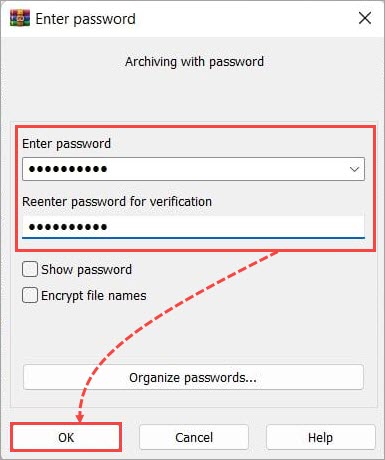
- Think of a password for the archive and enter it in the Enter password and Reenter password for verification fields.
We recommend using one of the standard passwords: virus, infected or kaspersky.
- Click ОК in the Enter password window.
- Click ОК in the Archive name and parameters window.
The password-protected archive will be created.